TextRaze
How to Remove Ring-Light Reflections from Glasses in Photos
A practical guide to distracting lens reflections: what AI can help with, what to inspect, and when to take another photo.
By TextRaze
Published Updated
Quick answer
For a photo you already have, a small lens reflection may be reduced with a selective manual edit or an AI glasses-glare tool such as TextRaze. Keep the glasses in place and compare the eyes and frames afterward. If a bright reflection completely covers an eye, AI cannot guarantee the true eye detail: it generates an estimate. Another frame, a reference photo for a skilled retoucher, or a retake is preferable when identity must stay exact.
Should you edit the glare or take another photo?
Choose based on the detail that remains in the lenses. Preventing a reflection during a shoot and removing one from an existing photo are separate tasks.
| Approach | Use it when | What to check |
|---|---|---|
| Change the light or face angle and retake | You can take another photo and need the eyes to remain faithfully recorded. | Move the reflection away from both eyes, keep a natural pose, and inspect a test frame at a larger size. |
| Make a selective manual correction | A small highlight or colored reflection leaves the eye and frame boundaries visible. | Keep the correction local. A brightness change alone may not remove an opaque white patch. |
| Try AI glasses-glare reduction | You have one still portrait with one main glasses wearer and want a candidate edit without painting a mask. | TextRaze aims to reduce lens reflections, but eyes, skin, frames, and crop can change. Compare them before using the result. |
| Choose another frame or a reference-based retouch | Glare completely hides an eye and exact appearance matters. | Do not treat a plausible generated eye as recovered information. A real reference supplies detail that this photo lacks. |
Example: window reflections in a café portrait
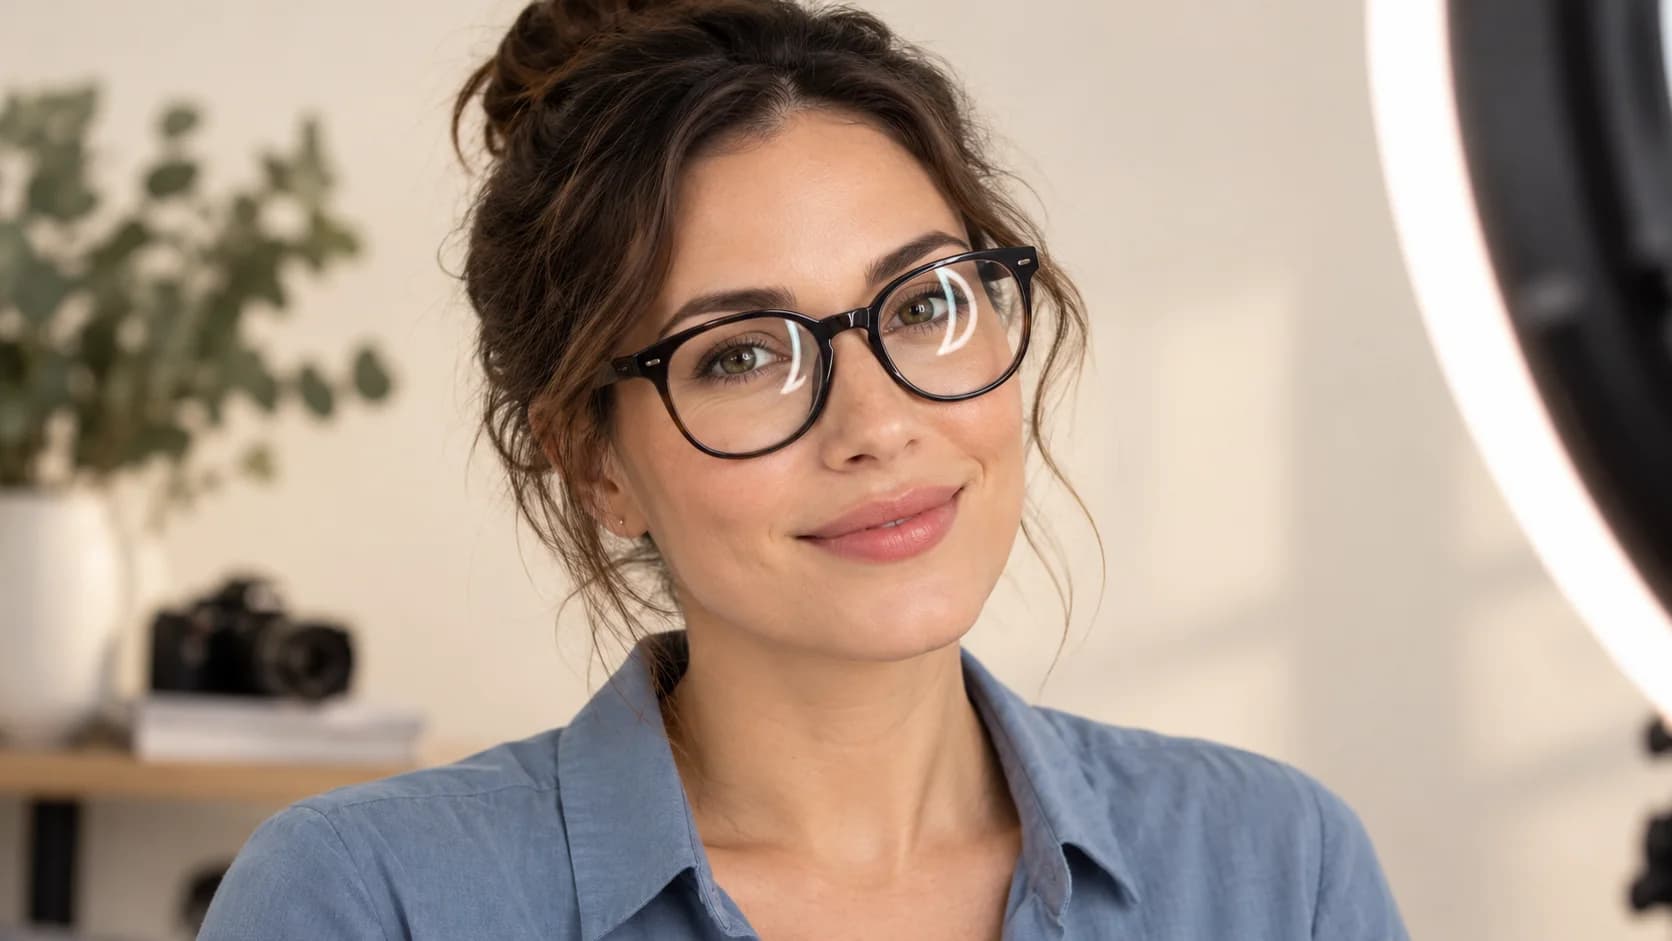
This portrait shows window reflections, rather than ring-light glare. Eye detail is still visible in the source. One TextRaze generation reduced the bright shapes on the lenses; the original and output are shown below.
Original

TextRaze result

- The bright window shapes on the lenses are reduced, and the metal frames remain visible.
- Compare the eyes, skin texture, face, and framing as well as the glare. A cleaner lens does not establish that facial details stayed identical.
- When checking your own portrait, compare the iris color, gaze, lens edges, and skin detail at full size.
An AI-generated sample portrait, edited with TextRaze on October 10, 2026. The result is shown without manual retouching.
Why a ring light shows up in glasses
Eyeglass lenses reflect some of the light that reaches them. When a ring light sits close to the camera’s line of sight, its reflection can be directed back toward the camera. The result may be a bright circle on each lens, a broken white arc, or a colored patch caused by the lens coating.
The visibility of the reflection depends on the light, camera, lens curvature, and angle of the person’s head. A reflection can cover a small patch of clear lens or overlap the pupil and eyelid. That distinction matters: removing a small distraction is different from reconstructing an eye that the camera did not capture clearly.
Before you edit, decide what the photo is for. A casual profile picture allows a different level of interpretation from a photograph used to document someone’s appearance. For ID or other regulated submissions, follow the issuer’s requirements; do not assume an AI-edited portrait will be accepted.
1. Choose a photo with useful detail around the glare
Start with the original, sharpest version of the portrait. Repeatedly saved social-media images can lose the fine boundaries between the eye, reflection, and frame. If you took several photos, choose one with the smallest reflection and the clearest eyes, even if another frame has slightly better lighting.
Keep the full face and glasses in the image. An extremely tight crop of the lenses removes context that helps you judge identity and expression. TextRaze currently supports still photos with one main glasses wearer, one image at a time. Choose a suitable single-person portrait; selective edits to several glasses wearers, batch processing, and video are outside the current scope.
- The face is sharp enough to compare eyelashes, eyelids, and frame edges.
- The image includes both lenses and the surrounding face.
- An untouched original is available for comparison.
- You have permission to edit and use the portrait.
2. Run the edit and compare the whole portrait first
Upload the photo to the glasses-glare tool and continue into the editor. Review the image and credit cost before starting the removal. When the result is ready, switch between the original and edited image. Begin at a normal viewing size, with both versions displayed at the same scale.
Ask whether the portrait still feels like the same photograph. Check the head position, expression, crop, lighting, and skin texture. A model may reduce lens glare while also smoothing a face or changing the frame color. Those changes are worth catching before you focus on how clean the lenses look.
If the glare originally covered an eye, a newly visible eye is a reconstruction. It can look plausible without matching the real iris, gaze, or eyelid. Compare with visible information in the original, but do not treat the edit as a way to discover the exact appearance hidden behind an opaque reflection.
3. Zoom in on eyes, frames, and lens edges
Look at one lens at a time, then at the face as a whole. A small local improvement can still change the balance of the expression. Compare the direction of both eyes and whether the eyelids and eyebrows keep the same shape. If one pupil points differently, the portrait can feel wrong even when the edit is subtle.
Next inspect the glasses. Dark frames should remain dark, thin metal rims should keep their shape, and the bridge and arms should connect naturally. Watch for missing sections where a bright reflection met the frame. Lenses do not need to become perfectly invisible; some natural reflection can be consistent with the scene.
- Eyes: gaze, iris appearance, eyelids, and symmetry remain believable.
- Frames: color, thickness, shape, bridge, and arms match the original.
- Face: expression and skin texture have not changed in an unwanted way.
- Scene: hair, clothing, background, lighting, and crop still look consistent.
- Final file: inspect the downloaded image at your intended display size.
How to avoid the reflection when taking the next photo
Move the light slightly above or to one side of the camera and take a test photo. The aim is to change the reflection angle so the bright shape no longer points back toward the lens. A small movement can make a large difference. Adjust one thing at a time so you can see which change helps.
You can also try a gentle change in head angle, as long as the pose remains comfortable and natural. Check both lenses after each adjustment: the reflection may disappear from one and remain in the other. Avoid solving glare by tilting the head so far that it creates an awkward portrait.
A broad, diffused light may create a softer reflection, but it can still show up in glasses. Lowering brightness alone may darken the face without fixing the reflection angle. Lens coatings can reduce some reflections, yet they do not guarantee a glare-free photo. Review a close-up on screen before finishing the shoot.
Common questions
Can glare be removed without changing the glasses?
That is the goal, but a generated edit can still change the frames or nearby face. Check the result against the original, especially where glare overlaps a dark rim. Keep the original if the edit changes details you need to preserve.
What if the reflection completely hides an eye?
The model has to infer what is behind it. It cannot verify the person’s actual hidden eye from that photograph. For faithful results, use another frame with less glare or take a new photograph.
Does this also remove shadows from a portrait?
Glasses-glare removal targets lens reflections. Distracting shadows are a different problem and have a separate tool. Avoid treating normal facial shading as a defect; it helps give the portrait depth.
Working on a price, date, or label in your own design? Edit Text in a Photo is the dedicated tool for changing words.